
Combat in STAR WARS Zero Company is built around squad-wide turns, three action points per operator and a shared Advantage resource. Cover, weapon costs and reaction fire shape the same decision: how much can your team achieve before it hands the turn to the enemy?
Source: EA · Gameplay
Action points and turn order
The player’s team acts, then the enemy team acts. Each operator begins with three AP, but three AP does not mean three identical attacks. Movement distance, weapons and abilities affect the cost, and some attacks consume the operator’s remaining AP.
Before committing, check the action preview and the destination’s firing angle. A move that leaves the wrong amount of AP can prevent the attack you intended. Because you control the squad’s turn, consider whether another operator can first create a better opportunity by applying pressure or disrupting cover.
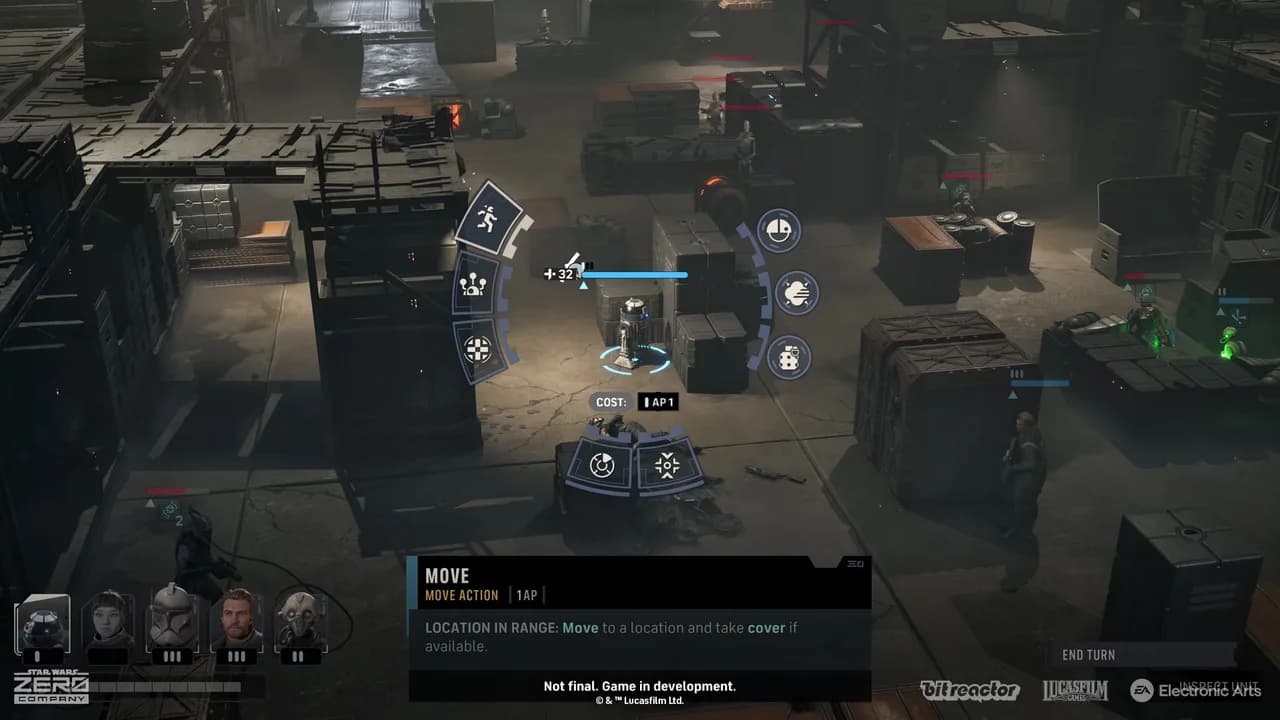
Source: EA · GameplayArekkz Gaming
Cover, elevation and sightlines
Partial and full cover, attack angles, elevation and line of sight affect combat. Some cover can be destroyed. A safe-looking object is therefore not an unconditional shield: the direction of the enemy’s attack still matters, and the battlefield can change during the turn.
Use cover as part of a firing plan. Check what your next position lets you see and what can see you. EA also demonstrates knockback moving an enemy into a teammate’s Overwatch cone, a useful example of positioning and squad abilities working together.
Source: EA · Gameplay
How Overwatch works
Overwatch covers a chosen cone and can react to enemy movement or actions inside it. The AP committed affects the number of shots, while distance in the cone affects accuracy. Entering Overwatch ends that operator’s turn, so resolve other intended actions before setting it.
In EcksToo’s gameplay explanation, an exposed operator can lose an Overwatch setup after being hit. That is an attributed gameplay observation, not a promise about every ability or difficulty. The practical lesson is to assess exposure before investing the operator’s remaining turn in reaction fire.
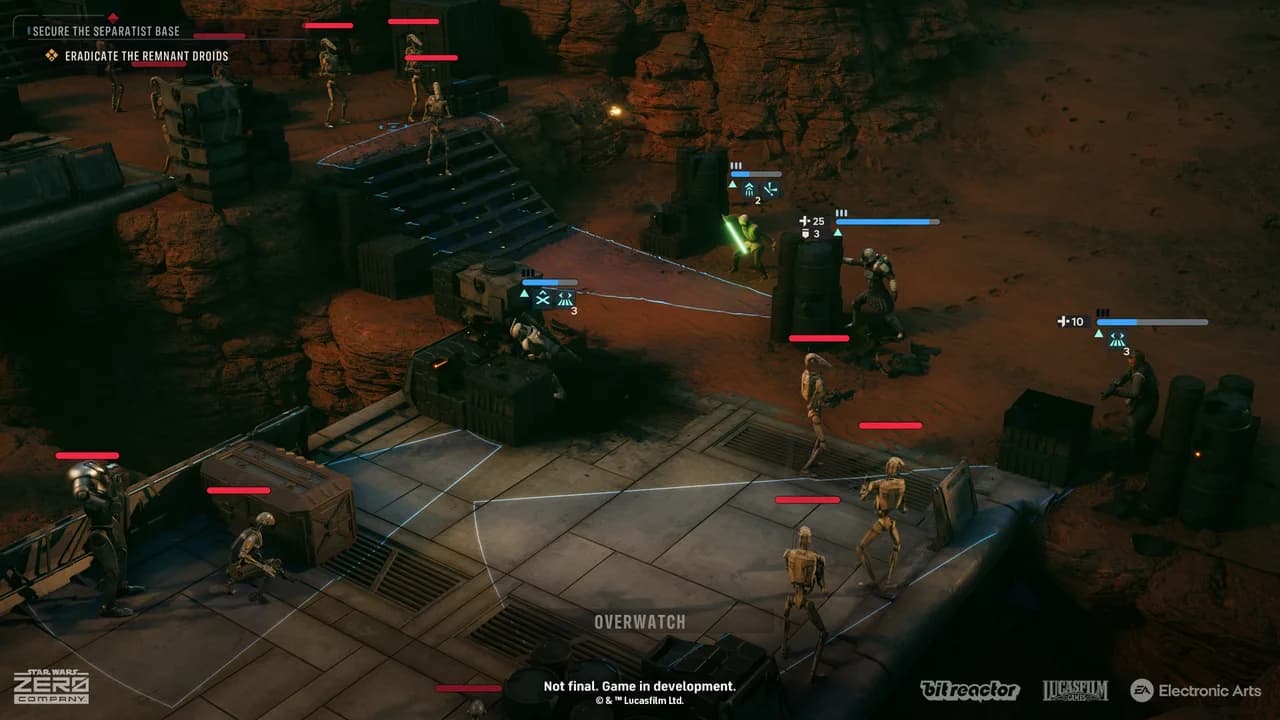
Source: EA · GameplayEcksToo
Advantage and Call for Backup
Advantage belongs to the squad and caps at ten. Successful tactical actions and abilities can generate it. Spending it enables powerful abilities without an additional AP charge, but those options compete for the same pool. Examples in EA’s explanation include support that grants an ally an AP and offensive abilities such as a rocket attack; read the actual ability cost before choosing.
Once each turn, one randomly selected operator can Call for Backup, asking a teammate to assist their next attack. The setup costs no AP and cooperation develops Bonds. Look for this option while planning the team’s attacks rather than remembering it after everybody has finished.
For an approachable sequence, inspect costs and angles, arrange cooperative opportunities, take the actions you need, then settle into your intended end-of-turn positions. It is a checklist, not an unbreakable combo: the enemies and objective determine the priorities.